
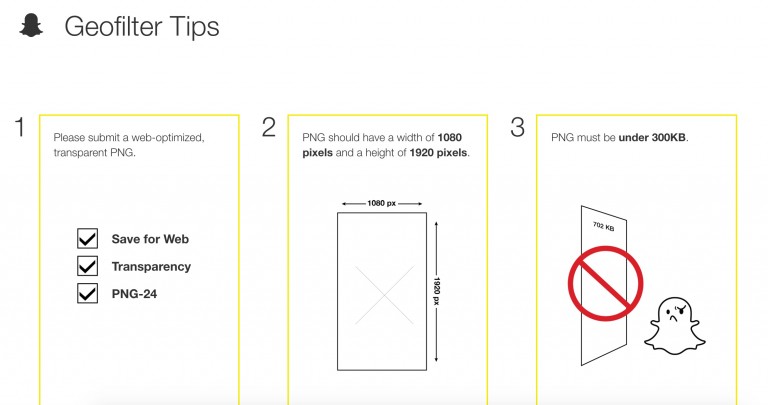
This is just a screen with important tips. You NEED to follow these guidelines or your filter will not be approved.
4. After that you will see this screen:
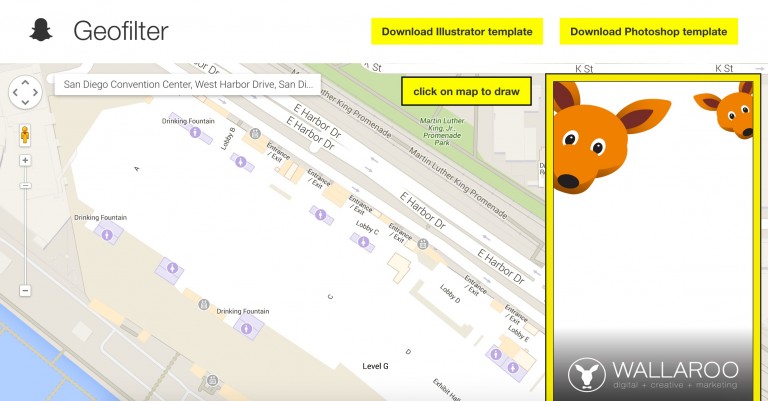
This is where you will do four things (in no particular order):
- Upload your geofilter
- Fill out your personal info (below the geofilter)
- Enter the address near the area you want to sponsor
- Draw the exact area that you want to sponsor. More on that next…
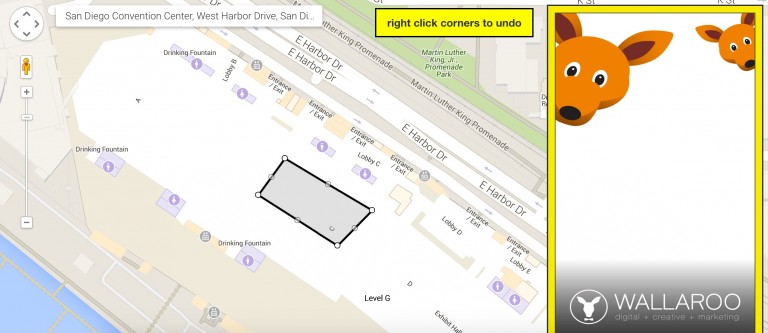
5. Drawing the exact area you want to sponsor is easy. You just click 4 times to create a quadrilateral of some kind. Snapchat will charge you based on the size of this shape and the duration of your sponsorship, so keep that in mind. It will look like this:
6. Once you do that, scroll down and click Submit. Then you have to wait for Snapchat to manually review your geofilter, and you’ll get an email once it’s approved.
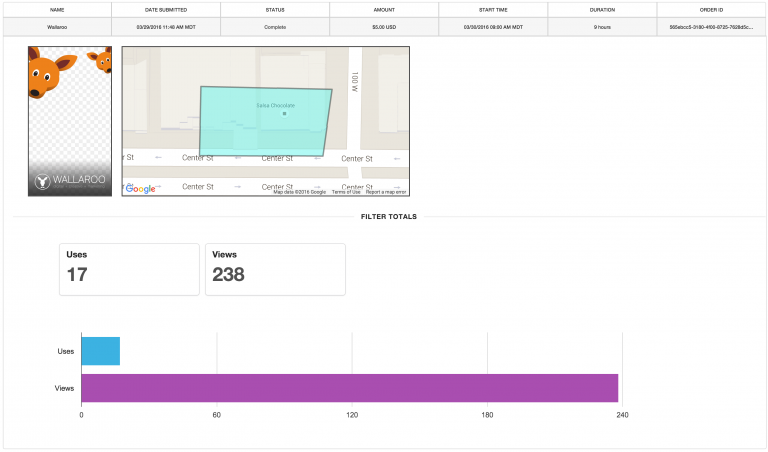
UPDATE: Snapchat now provides analytics on geofilters! Usually it takes a day or so to see the data. If you go to https://geofilters.snapchat.com/metrics you will see a dashboard like the screenshot below (if you’ve done a filter).
Everyone should give “Snaphacking” a try! The cost can be really cheap (as low as $5). And the results can be really, really good. If you have any more questions, please feel free to tweet me! Good luck!
Update: Snapchat CPMs are the best we’ve seen on any social platform. It’s tough to get an official average because costs vary depending on location, but we’ve seen CPMs as low as 20 cents!


